How to Get a Google Places API Key (Step-by-Step Guide)
A complete walkthrough for creating a Google Places API key in 2026 — Cloud project setup, billing, enabling Places API (New), key restrictions, a working test request, and the pricing model that catches teams out.
TL;DR
Create a Google Cloud project, enable billing, enable Places API (New), then create a key under Credentials. Restrict it immediately by referrer or IP and by API. Every request needs an X-Goog-FieldMask header, and the fields you request decide your price tier.
Step-by-step.
You need a Google Places API key to pull address autocomplete, business listings, or location search into your app. Getting one takes about ten minutes.
The setup itself is straightforward. What trips people up is what comes after: billing, key restrictions, and a pricing model that changed significantly in 2025. This guide covers all of it.
What the Places API Actually Does
The Places API gives your application access to Google's database of over 200 million places. Businesses, landmarks, addresses, points of interest.
Most teams use it for one of four things. Address autocomplete in a checkout or signup form. A store locator. Search for nearby businesses. Pulling details like opening hours, phone numbers, or ratings into a listing.
One important thing before you start. There are two versions: Places API and Places API (New). Since March 2025, the legacy version can no longer be enabled on new Google Cloud projects. If you are starting fresh, Places API (New) is your only option. Projects that already had legacy access can keep using it, but it is frozen and receives no new features.
Build on the new one.
Before You Start
You need three things.
A Google account. Any Gmail account works.
A Google Cloud project. We create one below.
A billing account with a valid card. This is required even if you plan to stay inside the free usage limits. Google will not issue a working key without it.
Step 1: Create or Select a Google Cloud Project
Go to console.cloud.google.com and sign in.
Click the project dropdown at the top of the page. Then click New Project.
Give it a name that identifies the app, not something generic. "MyProject" becomes useless once you have five of them.
Click Create and wait a few seconds. Then make sure the new project is selected in the dropdown before continuing. Enabling an API on the wrong project is the single most common mistake in this whole process.
Step 2: Enable Billing
In the left sidebar, open Billing.
Link a billing account, or create one if this is your first project. You will enter card details.
Google does not charge you for staying inside the free monthly limits. But without a billing account attached, every API call returns a permission error, and the error message does not tell you billing is the reason.
Step 3: Enable the Places API (New)
In the left sidebar, go to APIs and Services, then Library.
Search for "Places API (New)". Note the "(New)" — you may also see the legacy entry listed.
Click it, then click Enable.
If you are building address autocomplete on a web page, also enable Maps JavaScript API. If you need to convert addresses into coordinates, enable Geocoding API too. Each one is enabled separately.
Step 4: Create Your API Key
Go to APIs and Services, then Credentials.
Click Create Credentials at the top, then choose API key.
A dialog appears with your new key. Copy it somewhere safe.
That key now works. It is also completely unrestricted, which means anyone who finds it can run up charges on your billing account. Do not stop here.
Step 5: Restrict the Key
This step is not optional and it is the step most tutorials skip.
Click Edit API key on the key you just created. You will set two kinds of restriction.
Application restrictions control who can use the key.
For a website, choose HTTP referrers and add your domains: https://yourdomain.com/* and https://*.yourdomain.com/*. Add http://localhost:3000/* for local development.
For a server-side backend, choose IP addresses and add your server's IP.
For mobile, choose Android apps or iOS apps and supply the package name with SHA-1 fingerprint, or the bundle ID.
API restrictions control what the key can call.
Select Restrict key, then tick only the APIs you enabled in Step 3. A key that can call every Google API is a liability.
Save. Restrictions can take up to five minutes to take effect.
Step 6: Test the Key
Run this from your terminal, replacing YOUR_API_KEY:
curl -X POST -d '{"textQuery":"coffee in Jaipur"}' -H "Content-Type: application/json" -H "X-Goog-Api-Key: YOUR_API_KEY" -H "X-Goog-FieldMask: places.displayName,places.formattedAddress" https://places.googleapis.com/v1/places:searchText
You should get JSON back with place names and addresses.
Note the X-Goog-FieldMask header. The new Places API rejects requests without it. This catches out everyone migrating from the legacy API, where the header did not exist.
Understanding Places API Pricing
Google restructured Maps Platform billing on 1 March 2025. The old flat $200 monthly credit is gone. It was replaced by free monthly usage caps applied per SKU, organised into Essentials, Pro, and Enterprise tiers.
Here is the part that costs teams real money: your SKU tier is determined by which fields you request, not which endpoint you call.
Ask for place IDs and names only, and you sit in the cheapest tier. Add formatted address and location, and you move up. Add phone number or website, and you move up again. Add ratings or reviews, and you land in the most expensive tier.
Requesting every available field "just in case" can multiply your bill several times over. Set a tight field mask and only widen it when you actually need more.
Two more things worth knowing. Use session tokens for autocomplete, which bundles the keystrokes into one billable session instead of charging per character. And set hard per-API quotas in the console — budget alerts only notify you, they do not stop usage.
Rates and free caps change. Confirm the current numbers on your own Cloud Console billing page before you commit to an architecture.
Common Errors and What They Mean
REQUEST_DENIED, "not authorized to use this API." The API is not enabled on this project, or you are on the wrong project.
403 PERMISSION_DENIED. Usually billing. Check that a billing account is linked and active.
"API keys with referer restrictions cannot be used with this API." You put an HTTP referrer restriction on a key being used server-side. Referrer restrictions only work for browser requests. Create a second key with IP restrictions for your backend.
400, field mask required. You omitted the X-Goog-FieldMask header. Required on every Places API (New) request.
RefererNotAllowedMapError. Your current domain is not in the referrer list. Check for a missing wildcard or a forgotten localhost entry.
Everything worked, then stopped after five minutes. Restrictions finished propagating and one of them is wrong.
Keeping the Key Secure in Production
Never commit an API key to Git. Use environment variables and add .env to .gitignore.
Use separate keys for development, staging, and production. If one leaks, you rotate one key instead of taking down everything.
Browser keys are visible in your page source. That is unavoidable — which is exactly why the referrer restriction matters. For anything sensitive, proxy the call through your own backend so the key never reaches the client.
Set a billing budget alert. Then set per-API quotas as well, because alerts alone will not stop a runaway loop.
Where This Fits in a Real Project
An API key is the starting line, not the finish. The work after this is rate limiting, caching responses so you are not paying twice for the same lookup, and handling the failure cases gracefully when Google returns nothing.
Our team has built location-aware features into production apps across logistics, events, and food delivery. You can see the stack we work with on our technologies page and browse shipped work in our projects portfolio.
If you are setting up the surrounding environment, the NVM on Windows tutorial covers Node version management, and the SSL certificate guide handles securing the server this will run on.
More walkthroughs are on the tutorials hub, and longer technical writing lives on the blog.
Frequently asked.
Is the Google Places API free?+
There is no longer a flat $200 monthly credit. Since March 2025, Google applies free monthly usage caps per SKU. Light usage such as a small store locator often stays free, but production traffic exceeds the caps. A billing account with a valid card is required regardless.
What is the difference between Places API and Places API (New)?+
Places API (New) is the current version with a different request format, mandatory field masks, and its own SKU pricing. The legacy version was frozen in March 2025 and can no longer be enabled on new Cloud projects. New builds must use Places API (New).
Why does my Places API key return REQUEST_DENIED?+
Three usual causes. The API is not enabled on the project you are calling from. Billing is not linked. Or a key restriction is blocking the request — for example a referrer restriction on a key being used from a server.
Do I need a credit card for a Google Places API key?+
Yes. Google requires an active billing account before the key will return data, even if your usage stays inside the free monthly caps.
Can I use one API key for multiple Google APIs?+
Technically yes, but you should not. Restrict each key to only the APIs it needs, and use separate keys for development, staging, and production. A leaked unrestricted key can be used against any enabled service on your billing account.
How do I stop my Google Places API bill from getting out of control?+
Request the minimum set of fields in your field mask, since fields determine your price tier. Use session tokens for autocomplete. Cache repeated lookups. And set per-API quotas in the Cloud Console — budget alerts notify you but do not stop usage.
Have a project in mind?
Our team has shipped production software for client apps — from initial integration to scaling, caching and cost optimisation. We’d love to help.
Continue with Tutorials.
View all tutorials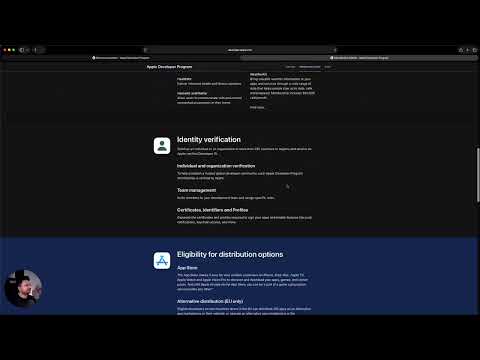 Apple Developer Account
How to Enroll in the Apple Developer Program (Step-by-Step)
Publishing an app on the App Store requires an Apple Developer Program membership. It costs 99 USD per year and enrollment takes anywhere from a day to several weeks. The length of that range depends almost entirely on one choice you make at the start: individual or organization. Get it wrong and you either wait weeks you did not need to, or ship an app with the wrong name on it permanently. Individual or Organization: The Decision That Matters Both cost the same. The difference is what customers see and what you can do. Individual Organization Seller name on the App Store Your personal legal name Your company name D-U-N-S Number required No Yes Team members in App Store Connect No — one Apple ID only Yes, with role-based access Typical approval time Hours to a few days One to several weeks Requirements Apple ID with two-factor authentication Registered legal entity, D-U-N-S Number, legal authority to sign The seller name is the part people regret. On an individual account, your legal name appears on your App Store listing where the developer name goes. Every customer sees it. There is no setting to display a company name instead. If you are building something under a brand, and particularly if you might sell the app or take on investors, enroll as an organization. Switching afterwards is not a settings change — it involves a separate enrollment and transferring your apps across. Individual enrollment is right for a personal project, a portfolio piece, a freelancer publishing under their own name, or anything you need live quickly. What You Need Before Starting For individual enrollment: an Apple ID with two-factor authentication enabled, and a payment method. That is it. A Managed Apple ID issued by a school or employer will not work. For organization enrollment: a legal entity registered in your country — a sole trader or DBA is generally not sufficient. A D-U-N-S Number for that entity. A public website on your company's domain. And you must have legal authority to bind the organization, or an authorised person available to confirm it. Getting a D-U-N-S Number A D-U-N-S Number is a nine-digit business identifier issued by Dun & Bradstreet. Apple uses it to verify your company exists. It is free. Apple provides a lookup tool that checks whether your company already has one — many registered businesses do without knowing it. If you do not have one, request it through Apple's lookup form rather than paying Dun & Bradstreet for expedited service. Turnaround is usually a few business days, though it can take longer in some countries. The details you register — legal entity name, address, phone number — must match your Apple enrollment exactly. A mismatch between your D-U-N-S record and what you type into Apple's form is the most common cause of a rejected organization enrollment. Not a wrong address; a differently formatted one. Step 1: Start Enrollment Individual enrollment now runs through the Apple Developer app on an iPhone or iPad in most regions, because it uses the device for identity verification. Download the app, sign in with your Apple ID, and choose Enroll. Organization enrollment can be completed on the web at developer.apple.com/programs/enroll. Either way, sign in with the Apple ID that will own this account. Choose carefully — this becomes the Account Holder, and moving it later is administratively painful. Use a company-controlled address such as appstore@yourcompany.com rather than a personal one or an individual employee's. Step 2: Provide Your Details For individuals, this is identity verification. You may be asked to scan a government ID. For organizations, you enter your legal entity name, D-U-N-S Number, address, and website. Enter these exactly as they appear on your D-U-N-S record. Apple may telephone the number on your D-U-N-S record to confirm your authority to enrol. Make sure someone answers it and knows the call is coming. Step 3: Pay and Wait The fee is 99 USD per year, or the local equivalent, and it renews automatically. Local taxes may apply on top. Individual enrollment often completes within 24 to 48 hours. Organization enrollment commonly takes one to two weeks and occasionally longer if verification stalls. If you are working to a launch date, start this before you start building. Waiting on Apple with a finished app is a bad place to be. Step 4: Add Your Team This is where organization membership earns its keep, and it is what the video refers to when it mentions sharing access. In App Store Connect, go to Users and Access and invite people by email. Each gets a role: Account Holder — one person, owns the membership and handles renewal. Admin — full access including user management and agreements. App Manager — manages apps and submits builds, no financial or legal access. Developer — uploads builds and manages certificates. Marketing — edits metadata and screenshots only. Finance — sees reports and payments only. Give an external developer or agency the App Manager or Developer role, not Admin. They can build and ship without touching your agreements, banking details, or user list. This is the same principle as scoped registrar access — the client owns the account, the agency gets what it needs. Individual accounts have no roles at all. One Apple ID, no delegation. If you plan to work with anyone else, that limitation arrives fast. Trader Status for the EU Since February 2025, anyone distributing apps in the European Union must declare trader status under the Digital Services Act and provide contact details that Apple displays publicly on the App Store listing. If you do not complete this, your apps are removed from EU storefronts. It applies to individual accounts too, and the required contact details become public. Complete it in App Store Connect under Business, then Trader Status, before you plan an EU release. Common Enrollment Problems Organization enrollment rejected, details do not match. Your D-U-N-S record differs from what you entered. Even formatting differences count. Look up your record, then copy it verbatim. Apple cannot verify your website. It must be live, on your company's own domain, and clearly associated with the legal entity name. A Linktree or a social profile will not do. Cannot enroll on the web as an individual. Expected in most regions now. Use the Apple Developer app on an iPhone or iPad. Two-factor authentication cannot be enabled. You are using a Managed Apple ID. Create a standard personal Apple ID instead. Enrolled but cannot submit an app. Outstanding agreements. Check Business, then Agreements, in App Store Connect. Paid apps additionally require complete banking and tax details. Membership expired and apps disappeared. The App Store removes apps when membership lapses. Renewal restores them, but the outage is real. Keep the payment method current. Where This Fits in a Real Project Enrollment is the administrative front end of shipping to iOS. Behind it sit certificates, provisioning profiles, TestFlight distribution, App Store review, and a release process that does not depend on one person's laptop. Our team ships production iOS apps for clients — several are live on the App Store, including restaurant ordering, events, and directory apps. We work inside the client's own developer account with a scoped role rather than holding the membership ourselves, so the client owns their listings. You can see how we work on our work process page and browse shipped apps in our portfolio . For the equivalent on the domain side, the GoDaddy delegate access guide covers granting scoped registrar access without sharing credentials. More walkthroughs are on the tutorials hub , and longer technical writing lives on the blog .
 Craxinno Technologies
How to Grant Delegate Access to Developers in GoDaddy
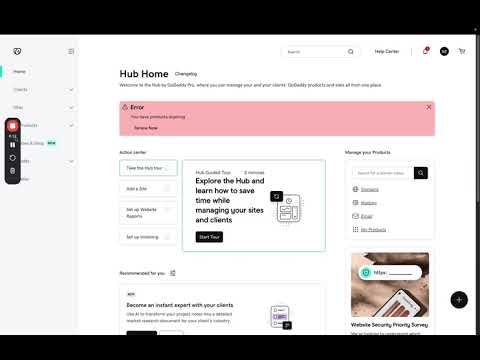
Your developer needs to update DNS records. The obvious move is to send them your GoDaddy login. Do not. Sharing a password means they can see your billing, your other domains, and every product on the account — and if two-factor authentication is enabled, it will not work for them anyway. GoDaddy Delegate Access solves this properly. Your developer signs in with their own credentials and sees only what you allowed. You can revoke it in two clicks when the project ends. What Is GoDaddy Delegate Access? Delegate Access lets you invite another GoDaddy user to manage parts of your account without giving them your password. They log in as themselves. Their actions are attributable to them. Nothing about your credentials changes, and two-factor authentication on your account stays intact. Both parties need a GoDaddy account. Creating one is free — your developer does not need to buy anything. Which Permission Level Should You Choose? This is the decision that matters, and GoDaddy's labels understate the difference. There are three levels: Level What they can do Use when Products & Domains Manage existing domains, DNS records, hosting, and websites. Cannot buy anything. Almost always. This is the right default. Products, Domains & Purchase Everything above, plus buy products and renewals using your stored payment method . Only if you genuinely want them spending on your card. Products, Domains, Purchase & Account Everything above, plus change account settings. Rarely. Effectively a co-owner. Start with Products & Domains. It covers everything a developer normally needs: editing DNS, pointing a domain at a new host, connecting a subdomain, managing SSL. The second level exists for people who should be able to renew a domain without asking you. Granting it means someone else can charge your card. The third level should be reserved for a business partner or an in-house administrator, not a contractor. You can raise the level later if a specific task requires it. Going the other way — realising too late that a contractor could change account settings — is the harder conversation. How to Grant Delegate Access in GoDaddy Sign in to your GoDaddy account. Click your profile in the top right, then Account Settings, then Delegate Access. Under "People who can access my account," click Invite to Access. Enter your developer's name and the email address on their GoDaddy account. This matters — the invitation is tied to that address. If they have a GoDaddy account under a different email, the invite will not connect to it. Choose the access level. See the table above. Click Invite. GoDaddy emails them a link. What Your Developer Does Next They open the email and click the invitation link. If they already have a GoDaddy account, they sign in and accept. If not, they create one first — free, no purchase needed. To use the access afterwards, they sign in to their own GoDaddy account, click their profile, then Account Settings, then Delegate Access, and look under "Accounts I can access." Selecting your account switches them into it. This is the step people get stuck on. The delegate does not receive a special login — they use their own account and switch. If your developer says they cannot find your domain, this is almost always why. How to Revoke Delegate Access Go to Account Settings, then Delegate Access. Find the person under "People who can access my account," click the three dots beside their name, and choose Delete. Access ends immediately. Do this the day a project ends. Delegate access does not expire on its own. Agencies and contractors accumulate access to client accounts they finished with years ago, and nobody notices until there is a reason to look. What Delegate Access Does Not Cover Worth knowing before you assume it is handled. Email mailboxes. Microsoft 365 and Workspace Email accounts bought through GoDaddy are managed separately. A delegate can see the product but not read mail. Some account-level actions remain restricted below the highest permission level, including certain settings changes. Other registrars. If a domain sits with Namecheap or Cloudflare, this does nothing for it. Each registrar has its own mechanism. Your other accounts. Delegate access is per GoDaddy account. If you have several, invite them to each one. Common Problems The invitation never arrived. Check spam. Confirm the email address matches the one on their GoDaddy account exactly. Resend from the Delegate Access page. They accepted but cannot see the domain. They are looking at their own account rather than switching into yours. Point them to Account Settings, then Delegate Access, then "Accounts I can access." They can see the domain but cannot edit DNS. The permission level is too low, or the domain uses external nameservers — in which case DNS is managed wherever those nameservers point, not at GoDaddy. The invite link expired. Invitations time out. Send a new one. They cannot buy or renew. Expected on Products & Domains. Either handle the purchase yourself or raise the level deliberately. Better Practice for Agencies and Clients If you are the developer asking a client for this, ask for the lowest level that does the job, and say why. "Products & Domains is enough — I do not need purchase rights" builds more trust than accepting full access without comment. If you are the client, grant one delegate per person rather than one shared account for a team. Attribution is the whole point. And put an end date on it. When the engagement finishes, revoking access should be on the same checklist as the final invoice. Where This Fits in a Real Project Access management is a small piece of a handover that usually goes badly. The larger question is who owns the domain, the hosting, the repository, the analytics, and the DNS at the end of a project — and whether any of it depends on a contractor's personal account. Our team works inside client infrastructure regularly, and we ask for scoped access rather than credentials as a matter of course. You can see how we work on our work process page and browse shipped projects in our portfolio . If you are configuring DNS once access is granted, the SendGrid on GoDaddy guide covers the record setup, and the SSL certificate guide handles TLS on the server behind it. More walkthroughs are on the tutorials hub , and longer technical writing lives on the blog .
 Tailwind
How to Set Up Tailwind CSS v4 in React + Vite
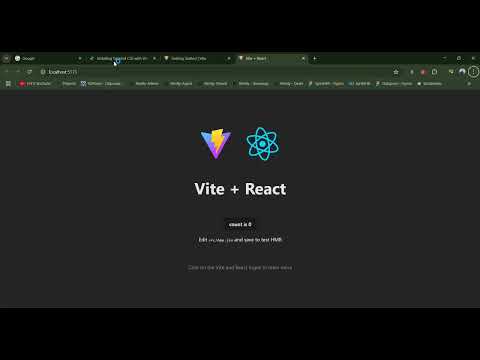
Setting up Tailwind CSS in a React and Vite project takes three steps and about sixty seconds — install two packages, add one plugin to your Vite config, add one line to your CSS file. If you have followed an older tutorial and hit errors, that is because Tailwind CSS v4 changed the installation completely. There is no tailwind.config.js , no PostCSS config, and no @tailwind directives any more. The Short Answer To set up Tailwind CSS v4 in a React and Vite project: Install the packages: npm install tailwindcss @tailwindcss/vite Add the plugin to vite.config.js : 1 2 3 4 5 6 import { defineConfig } from 'vite' ; import react from '@vitejs/plugin-react' ; import tailwindcss from '@tailwindcss/vite' ; export default defineConfig ( { plugins : [ react ( ) , tailwindcss ( ) ] , } ) ; Replace the contents of src/index.css with a single line: 1 @ import "tailwindcss" ; Run npm run dev . Tailwind is working. The rest of this guide explains what changed, why older instructions fail, and how to configure it. What Changed in Tailwind CSS v4 Tailwind CSS v4 was released in January 2025. It replaced the JavaScript configuration model with a CSS-first one. Tailwind v3 Tailwind v4 Install command npm install -D tailwindcss postcss autoprefixer npm install tailwindcss @tailwindcss/vite Init step npx tailwindcss init -p None Config file tailwind.config.js None — configure in CSS with @theme PostCSS config postcss.config.js required Not required with the Vite plugin CSS entry @tailwind base; @tailwind components; @tailwind utilities; @import "tailwindcss"; Content paths Declared manually in config Detected automatically Four things that used to be mandatory no longer exist. That is why v3 instructions produce errors rather than a working setup. Why Is npx tailwindcss init -p Not Working? Because the command was removed in Tailwind v4. There is no init step and no config file to generate. If you run it, you will get an error saying the command does not exist. Nothing is broken — you simply do not need it. The same applies to tailwind.config.js . Creating one has no effect in v4 unless you explicitly load it, which is only needed when migrating a large v3 project. Why Are My Tailwind Classes Not Working? Four common causes, in rough order of likelihood. You used v3 directives. If src/index.css contains @tailwind base; and the other two directives, replace all three with @import "tailwindcss"; . You did not import the CSS file. Check that src/main.jsx contains import './index.css' . Vite does not load it automatically. You added the PostCSS plugin instead of the Vite plugin. With Vite, use @tailwindcss/vite in vite.config.js . The @tailwindcss/postcss package is for build tools that are not Vite. You did not restart the dev server. Changes to vite.config.js require a restart. Hot reload does not pick them up. How Do I Configure Colors and Fonts in Tailwind v4? Configuration moved into your CSS file, using the @theme block. 1 2 3 4 5 6 7 8 @ import "tailwindcss" ; @theme { -- color - charcoal : #0a0a0b ; -- color - cream : #f4f1ea ; -- color - amber : # FBA927 ; -- font - display : "Space Grotesk" , sans - serif ; -- font - mono : "JetBrains Mono" , monospace ; } Those definitions generate utility classes automatically. --color-amber produces bg-amber , text-amber , border-amber , and every other colour utility. The naming prefix determines the utility family. --color-* generates colour utilities, --font-* generates font-family utilities, --spacing-* generates spacing, --breakpoint-* generates responsive breakpoints. Because these are real CSS custom properties, you can also read them anywhere in your stylesheet with var(--color-amber) , and inspect them in browser devtools. That was not possible with the JavaScript config. Do I Still Need content Paths in Tailwind v4? No. Tailwind v4 detects your source files automatically. It scans your project, respects your .gitignore , and skips binary files. There is no content array to maintain and no more classes silently missing because a folder was not listed. If you need to add a source outside the default detection — a component library in a separate package, for example — use the @source directive: 1 @source "../node_modules/@your-org/ui" ; Which Browsers Does Tailwind CSS v4 Support? Tailwind v4 requires Safari 16.4, Chrome 111, and Firefox 128 or later. All three were released in 2023 or earlier. This is stricter than v3 because v4 is built on modern CSS features — cascade layers, @property , and color-mix() among them. If you must support older browsers, stay on Tailwind v3.4. There is no v4 configuration that lowers the requirement. Adding an Editor Plugin Install the Tailwind CSS IntelliSense extension in VS Code. It gives you class autocomplete, hover previews of the underlying CSS, and warnings on conflicting classes. With v4 it reads your @theme block directly, so custom colours appear in autocomplete with the right swatches. Also add the Prettier plugin for class sorting: npm install -D prettier prettier-plugin-tailwindcss It orders utility classes consistently, which keeps diffs readable when several people work on the same components. Migrating an Existing Project from v3 to v4 Tailwind provides an automated upgrade tool: npx @tailwindcss/upgrade It requires Node.js 20 or higher. It converts your config to @theme , updates the CSS directives, and renames utilities that changed. Run it on a clean branch and review the diff. A few things it cannot fully handle: Renamed utilities — shadow-sm became shadow-xs , and the old shadow is now shadow-sm . Similar shifts affect rounded and blur . Removed opacity shorthands — bg-black/50 still works, but the older bg-opacity-50 pattern does not. Any custom plugin written against the v3 JavaScript API will need rewriting. For a small project, a manual migration is often faster than reviewing the tool's output. Where This Fits in a Real Project Tailwind handles styling. What determines whether a codebase stays maintainable is the layer above it — a component library with consistent variants, design tokens that match what your designers use in Figma, and a review habit that stops one-off utility strings accumulating in JSX. Our team builds and ships production React and Next.js interfaces for client software, including design system work and Figma-to-code delivery. You can see the stack we work across on our technologies page and browse shipped work in our projects portfolio. If you are still setting up, the React with TypeScript tutorial covers project creation with Vite. For deployment, the React on Netlify guide handles hosting, and the NVM on Windows tutorial covers Node version management. More walkthroughs are on the tutorials hub , and longer technical writing lives on the blog .

© 2026 — Craxinno Technologies