© 2026 — Craxinno Technologies



Real-world tutorials from the Craxinno engineering team — walkthroughs of problems we’ve actually solved in client projects.
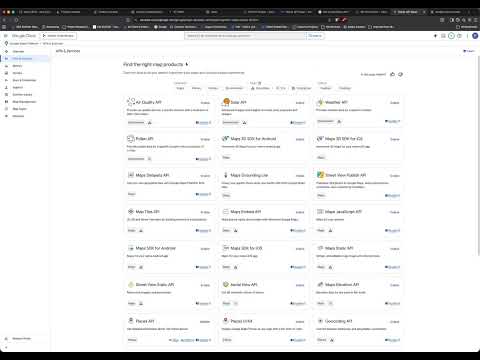
You need a Google Places API key to pull address autocomplete, business listings, or location search into your app. Getting one takes about ten minutes. The setup itself is straightforward. What trips people up is what comes after: billing, key restrictions, and a pricing model that changed significantly in 2025. This guide covers all of it. What the Places API Actually Does The Places API gives your application access to Google's database of over 200 million places. Businesses, landmarks, addresses, points of interest. Most teams use it for one of four things. Address autocomplete in a checkout or signup form. A store locator. Search for nearby businesses. Pulling details like opening hours, phone numbers, or ratings into a listing. One important thing before you start. There are two versions: Places API and Places API (New). Since March 2025, the legacy version can no longer be enabled on new Google Cloud projects. If you are starting fresh, Places API (New) is your only option. Projects that already had legacy access can keep using it, but it is frozen and receives no new features. Build on the new one. Before You Start You need three things. A Google account. Any Gmail account works. A Google Cloud project. We create one below. A billing account with a valid card. This is required even if you plan to stay inside the free usage limits. Google will not issue a working key without it. Step 1: Create or Select a Google Cloud Project Go to console.cloud.google.com and sign in. Click the project dropdown at the top of the page. Then click New Project. Give it a name that identifies the app, not something generic. "MyProject" becomes useless once you have five of them. Click Create and wait a few seconds. Then make sure the new project is selected in the dropdown before continuing. Enabling an API on the wrong project is the single most common mistake in this whole process. Step 2: Enable Billing In the left sidebar, open Billing. Link a billing account, or create one if this is your first project. You will enter card details. Google does not charge you for staying inside the free monthly limits. But without a billing account attached, every API call returns a permission error, and the error message does not tell you billing is the reason. Step 3: Enable the Places API (New) In the left sidebar, go to APIs and Services, then Library. Search for "Places API (New)". Note the "(New)" — you may also see the legacy entry listed. Click it, then click Enable. If you are building address autocomplete on a web page, also enable Maps JavaScript API. If you need to convert addresses into coordinates, enable Geocoding API too. Each one is enabled separately. Step 4: Create Your API Key Go to APIs and Services, then Credentials. Click Create Credentials at the top, then choose API key. A dialog appears with your new key. Copy it somewhere safe. That key now works. It is also completely unrestricted, which means anyone who finds it can run up charges on your billing account. Do not stop here. Step 5: Restrict the Key This step is not optional and it is the step most tutorials skip. Click Edit API key on the key you just created. You will set two kinds of restriction. Application restrictions control who can use the key. For a website, choose HTTP referrers and add your domains: https://yourdomain.com/* and https://*.yourdomain.com/* . Add http://localhost:3000/* for local development. For a server-side backend, choose IP addresses and add your server's IP. For mobile, choose Android apps or iOS apps and supply the package name with SHA-1 fingerprint, or the bundle ID. API restrictions control what the key can call. Select Restrict key, then tick only the APIs you enabled in Step 3. A key that can call every Google API is a liability. Save. Restrictions can take up to five minutes to take effect. Step 6: Test the Key Run this from your terminal, replacing YOUR_API_KEY: curl -X POST -d '{"textQuery":"coffee in Jaipur"}' -H "Content-Type: application/json" -H "X-Goog-Api-Key: YOUR_API_KEY" -H "X-Goog-FieldMask: places.displayName,places.formattedAddress" https://places.googleapis.com/v1/places:searchText You should get JSON back with place names and addresses. Note the X-Goog-FieldMask header. The new Places API rejects requests without it. This catches out everyone migrating from the legacy API, where the header did not exist. Understanding Places API Pricing Google restructured Maps Platform billing on 1 March 2025. The old flat $200 monthly credit is gone. It was replaced by free monthly usage caps applied per SKU, organised into Essentials, Pro, and Enterprise tiers. Here is the part that costs teams real money: your SKU tier is determined by which fields you request, not which endpoint you call. Ask for place IDs and names only, and you sit in the cheapest tier. Add formatted address and location, and you move up. Add phone number or website, and you move up again. Add ratings or reviews, and you land in the most expensive tier. Requesting every available field "just in case" can multiply your bill several times over. Set a tight field mask and only widen it when you actually need more. Two more things worth knowing. Use session tokens for autocomplete, which bundles the keystrokes into one billable session instead of charging per character. And set hard per-API quotas in the console — budget alerts only notify you, they do not stop usage. Rates and free caps change. Confirm the current numbers on your own Cloud Console billing page before you commit to an architecture. Common Errors and What They Mean REQUEST_DENIED, "not authorized to use this API." The API is not enabled on this project, or you are on the wrong project. 403 PERMISSION_DENIED. Usually billing. Check that a billing account is linked and active. "API keys with referer restrictions cannot be used with this API." You put an HTTP referrer restriction on a key being used server-side. Referrer restrictions only work for browser requests. Create a second key with IP restrictions for your backend. 400, field mask required. You omitted the X-Goog-FieldMask header. Required on every Places API (New) request. RefererNotAllowedMapError. Your current domain is not in the referrer list. Check for a missing wildcard or a forgotten localhost entry. Everything worked, then stopped after five minutes. Restrictions finished propagating and one of them is wrong. Keeping the Key Secure in Production Never commit an API key to Git. Use environment variables and add .env to .gitignore . Use separate keys for development, staging, and production. If one leaks, you rotate one key instead of taking down everything. Browser keys are visible in your page source. That is unavoidable — which is exactly why the referrer restriction matters. For anything sensitive, proxy the call through your own backend so the key never reaches the client. Set a billing budget alert. Then set per-API quotas as well, because alerts alone will not stop a runaway loop. Where This Fits in a Real Project An API key is the starting line, not the finish. The work after this is rate limiting, caching responses so you are not paying twice for the same lookup, and handling the failure cases gracefully when Google returns nothing. Our team has built location-aware features into production apps across logistics, events, and food delivery. You can see the stack we work with on our technologies page and browse shipped work in our projects portfolio. If you are setting up the surrounding environment, the NVM on Windows tutorial covers Node version management, and the SSL certificate guide handles securing the server this will run on. More walkthroughs are on the tutorials hub , and longer technical writing lives on the blog .
026tutorials
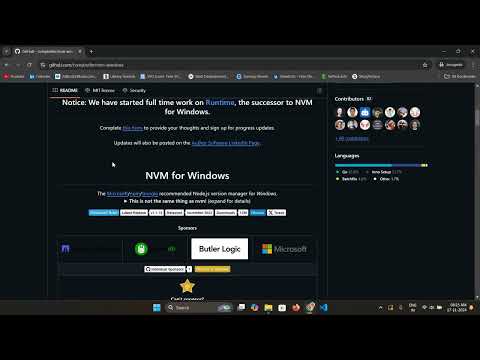
Every Node.js developer hits the same wall eventually. One project needs Node 18. Another needs Node 24. Your machine can only run one at a time. NVM for Windows solves this. It lets you install several Node.js versions side by side and switch between them with a single command. No uninstalling. No reinstalling. No broken projects. This guide walks through the full setup. Every command is included so you can follow along in your terminal. What NVM for Windows Actually Does NVM stands for Node Version Manager. The Windows build is a separate project from the Unix version. It was written by Corey Butler and it works differently under the hood. Here is the short version. NVM installs each Node.js version into its own folder. It then creates a symlink at C:\Program Files\nodejs that points to whichever version you selected. Your PATH never changes. Only the symlink target does. That is why switching versions is instant. Windows is simply following a different shortcut. Each Node.js version also carries its own npm and its own global packages. This matters more than most tutorials mention, and we cover it below. Before You Install: Remove Existing Node.js This step is not optional. Skip it and you will get strange PATH conflicts later. Open Settings, then Apps, then Installed apps. Search for Node.js. Uninstall it. Then delete these folders if they still exist: C:\Program Files\nodejs C:\Users\YourName\AppData\Roaming\npm C:\Users\YourName\AppData\Roaming\npm-cache Restart your machine. A stale PATH entry is the single most common cause of NVM failing quietly. Step 1: Download and Install NVM for Windows Go to the official releases page on GitHub. Download nvm-setup.exe from the latest release. Avoid third-party mirrors. Run the installer. It asks for two paths: Symlink location: C:\Program Files\nodejs NVM install root: C:\Users\YourName\AppData\Roaming\nvm Accept both defaults unless you have a reason not to. Paths with spaces or non-English characters cause problems. Finish the install. Then close every open terminal window. The installer edits environment variables, and open terminals will not pick up the change. Step 2: Verify the Installation Open a new terminal as Administrator. This part matters — NVM needs admin rights to create symlinks. Run: nvm version You should see a version number. If you see "nvm is not recognized," your PATH did not update. Restart the machine and try again. Step 3: Install a Node.js Version First, see what is available: nvm list available This prints a table of current, LTS, and older releases. To install the latest long-term support release: nvm install lts To install a specific version: nvm install 22.14.0 To install the newest release: nvm install latest Install as many as your projects need. Each one downloads into its own folder. Step 4: Switch Between Versions List what you have installed: nvm list An asterisk marks the version currently in use. Switch with: nvm use 22.14.0 Confirm it worked: node -v That is the whole workflow. Two commands and you are on a different runtime. You can also turn NVM's version management off temporarily: nvm off And back on: nvm on Step 5: npm and Global Packages Per Version This is where developers get caught out. Each Node.js version installs with its own bundled npm. It also keeps its own global packages folder. So if you install a CLI tool globally on Node 22: npm install -g pnpm Then switch to Node 24, that tool is gone. You have to reinstall it on the new version. Plan for this. Keep global installs to a minimum and prefer project-local dependencies. Your package.json should be the source of truth, not your machine. Common NVM Windows Errors and How to Fix Them "exit status 1: Access is denied." You are not running as Administrator. Close the terminal and reopen it with elevated rights. "node is not recognized" after nvm use. The symlink folder is missing from PATH. Add C:\Program Files\nodejs to your system PATH manually, then restart. Install hangs or fails to download. Corporate proxies block the download. Set the proxy with nvm proxy followed by your proxy URL. Antivirus software can also block the symlink creation. Version switches but node -v shows the old number. You are in a terminal that was open before the switch. Open a fresh one. Wrong architecture installed. Run nvm arch to check whether you are on 32-bit or 64-bit. You can force it with nvm install 22.14.0 64. How NVM for Windows Differs from Unix NVM If you have used NVM on macOS or Linux, expect some gaps. NVM for Windows does not read .nvmrc files natively. There is no aliasing system. There is no automatic version switching when you cd into a project folder. You can work around the .nvmrc gap in PowerShell: nvm use (Get-Content .nvmrc) It is not automatic, but it respects the file your team already uses. Which Node.js Version Should You Install in 2026? As of August 2026, Node 24 is the active LTS line and the right default for new projects. Node 22 is in maintenance LTS and supported into April 2027, which makes it fine for existing production apps you have not migrated yet. Node 26 is the current release and becomes LTS in October 2026. Node 20 and everything before it has reached end of life. Do not ship on it. One practical setup: install the active LTS as your daily driver, then add whatever older version your legacy projects still require. Two or three versions is usually enough. Where This Fits in a Real Project Version management is one small piece of a working development environment. Getting the rest right matters just as much. Our team works across Node.js, React, Next.js, and TypeScript on production client software. You can see the full stack we build on across our technologies page, and browse shipped work in our projects portfolio . If you are setting up a backend environment from scratch, the SSL certificate setup tutorial covers securing it once it is deployed. For data safety on AWS, the S3 backup guide walks through the same ground. More step-by-step guides are on the tutorials hub , and longer technical writing lives on the blog.
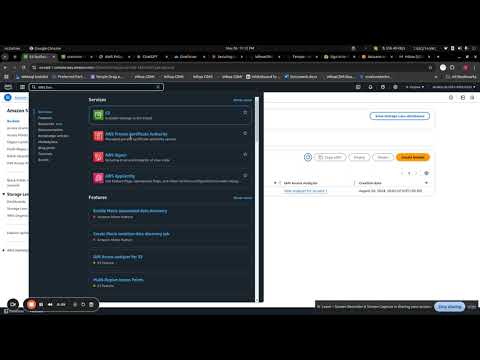
Losing an S3 bucket is not hypothetical. A bad deploy script, a misconfigured lifecycle rule, or one wrong IAM policy can wipe production data in seconds. AWS Backup gives you a centralised, policy-driven way to protect S3 against that. This guide walks through the full setup, from enabling versioning to locking the vault so nobody can delete your recovery points. Why S3 Versioning Alone Is Not a Backup Plenty of teams enable versioning and consider the job done. It is not. Versioning keeps old copies of overwritten objects in the same bucket. If someone deletes the bucket, the versions go with it. If an attacker gains credentials with sufficient permissions, they can remove versions too. A real backup lives somewhere the source cannot reach. That is what AWS Backup provides. What AWS Backup Adds Centralised policy. One backup plan can cover S3 alongside RDS, DynamoDB, EFS, and EBS. You stop managing five separate mechanisms. Point-in-time recovery. Continuous backups let you restore to any moment within the last 35 days, down to the second. Immutable storage. Vault Lock in compliance mode makes recovery points impossible to delete. Not by you, not by your root account, not by AWS Support. Cross-region and cross-account copies. Your backup can sit in a different region and a different account entirely. Restore granularity. You can restore an entire bucket or individual objects. Prerequisites S3 Versioning must be enabled on every bucket you want to protect. AWS Backup will reject the bucket otherwise. An IAM service role with the right permissions. If you use the default AWSBackupDefaultServiceRole , you still need to attach two S3-specific policies: AWSBackupServiceRolePolicyForS3Backup and AWSBackupServiceRolePolicyForS3Restore . This is the step people forget, and the failure shows up as an access-denied error on the first backup job rather than at setup time. Your backup vault must be in the same region as the buckets you are backing up. Step 1: Enable Versioning Open the S3 console. Select your bucket, then the Properties tab. Find Bucket Versioning and click Edit. Choose Enable and save. While you are here, add a lifecycle rule to expire noncurrent versions after a reasonable period. Without one, every overwrite accumulates forever and your S3 bill climbs quietly. Thirty to ninety days suits most workloads. Step 2: Create a Backup Vault Go to the AWS Backup console and open Backup vaults in the sidebar. Click Create backup vault. Name it something that identifies the environment — prod-s3-vault rather than vault1 . For the encryption key, choose a customer-managed KMS key rather than the AWS-managed default. A customer-managed key lets you control access through a key policy and revoke it independently, which matters if the account is ever compromised. Create the vault. Step 3: Create a Backup Plan Open Backup plans and click Create backup plan. You can start from a template or build from scratch. Building from scratch is worth the extra two minutes because the templates rarely match real retention requirements. Inside the plan, configure a backup rule: Rule name — something descriptive like daily-s3-35day . Backup vault — the one you just created. Backup frequency — daily is the usual starting point. Choose the frequency your recovery point objective actually requires, not the one that feels safe. Backup window — pick a low-traffic period and give it a generous completion window. S3 backup jobs on large buckets take longer than people expect. Continuous backups — tick this if you want point-in-time recovery. It gives you 35 days of second-level granularity. It requires versioning, which you enabled in Step 1. Lifecycle — set when recovery points move to cold storage and when they expire. Cold storage is substantially cheaper but has a 90-day minimum retention charge, so do not transition anything you expect to expire sooner. Copy to destination — add a cross-region copy here if you need geographic redundancy. Add a cross-account copy if you want protection against a full account compromise. Step 4: Assign Resources Still inside the plan, go to Resource assignments and click Assign resources. Give the assignment a name and select your IAM role. This is where the two S3 policies from the prerequisites section matter. Then choose how to select buckets. You have two options. Include specific resource IDs — you pick each bucket by name. Predictable, but you have to remember to update it when someone creates a new bucket. Include by tag — for example Backup = true . Any bucket carrying that tag is picked up automatically. This scales better and is the approach we use on client infrastructure, because it makes backup coverage a property of the resource rather than a thing someone has to remember. Save the assignment. Step 5: Lock the Vault This is the step that separates a backup from a real one. Open your vault and find Vault Lock. You have two modes. Governance mode. Recovery points cannot be deleted except by users with explicit permission to alter the lock. Useful for preventing accidents. Compliance mode. After the cooling-off period ends, the lock is permanent. Nobody can delete recovery points or shorten retention. Not you. Not AWS. Compliance mode is the right choice for ransomware protection, because it means a compromised admin account still cannot destroy your recovery points. But understand what you are agreeing to: you will pay for that storage for the full retention period no matter what. There is no undo. Start with governance mode if you are unsure. Move to compliance once your retention policy has settled. Step 6: Verify, Then Test a Restore Wait for the first scheduled job, or trigger one manually with Create on-demand backup. Check Jobs in the sidebar. The first backup of a bucket is a full copy and can take hours on large buckets. Subsequent backups are incremental. Then do the part almost nobody does: restore something. Go to Protected resources, pick your bucket, select a recovery point, and click Restore. Restore to a new bucket rather than overwriting the original. Confirm the objects and their metadata came back intact. An untested backup is an assumption. Put a restore test on the calendar quarterly. What AWS Backup for S3 Does Not Cover Objects already in S3 Glacier Flexible Retrieval or Glacier Deep Archive storage classes are not backed up. If you have lifecycle rules pushing data into deep archive, that data sits outside this protection. Very large buckets have documented object-count ceilings. Check the current AWS Backup limits before assuming a bucket with hundreds of millions of objects is covered. Backups are region-scoped by default. Without a cross-region copy rule, a regional failure takes your backups with it. And AWS Backup is not a replacement for S3 Replication. Replication is for availability and latency. Backup is for recovery. Different jobs. What This Costs AWS Backup bills separately from S3 itself. You pay for backup storage in warm and cold tiers, for the backup and restore requests themselves, and for cross-region data transfer if you enabled copies. The request charges are the ones that surprise people. Buckets with millions of small objects generate a lot of per-object activity, and the cost profile looks very different from a bucket holding a few large files at the same total size. Model your actual object count, not just your storage volume, before committing to a frequency. Then set an AWS Budgets alert on the Backup service so a change in object growth does not become a surprise invoice. Where This Fits in a Real Project Backup is one layer of a resilience strategy. It sits alongside encryption at rest, least-privilege IAM, and access logging. Any one of them alone leaves a gap. Our team builds and maintains AWS infrastructure for production client software, including data protection and disaster recovery design. You can see the stack we work across on our technologies page and browse shipped work in our projects portfolio . If you are securing the layer in front of this, the SSL certificate setup guide covers server-side TLS. For the application environment, the NVM on Windows tutorial handles Node version management. More walkthroughs are on the tutorials hub , and longer technical writing lives on the blog .

Serving a site over plain HTTP in 2026 means browsers flag it as insecure before anyone reads a word of it. Setting up SSL on Nginx takes about fifteen minutes. There are two paths. Certbot with Let's Encrypt is free, automated, and renews itself — this is the right choice for almost everyone. A purchased commercial certificate involves manual file handling and is only necessary in specific cases. This guide covers both. Before You Start You need a domain with an A record pointing at your server's public IP. DNS must have propagated. Certificate issuance verifies domain ownership, and it will fail if DNS is not resolving yet. Ports 80 and 443 must be open in your firewall and any cloud security group. Port 80 is required for the initial validation even though your site will end up on 443. You need root or sudo access, and Nginx already installed and running. Which Certificate Do You Actually Need? Let's Encrypt is free, issues in seconds, and auto-renews every 90 days. It provides domain validation, which is exactly the same encryption strength as any paid certificate. For the vast majority of sites, this is the correct answer. A commercial certificate is worth paying for in three situations. You need Organisation Validation or Extended Validation, where the certificate authority verifies your legal entity. You need a warranty and paid support for compliance reasons. Or you need a multi-year wildcard managed outside your server. Encryption is identical across all of them. What you pay for is the validation process and the paperwork, not stronger security. Path A: Let's Encrypt with Certbot Step 1: Install Certbot On Ubuntu or Debian, the snap package is what Let's Encrypt recommends: sudo snap install --classic certbot sudo ln -s /snap/bin/certbot /usr/bin/certbot The apt package exists but tends to lag behind. Step 2: Run Certbot sudo certbot --nginx -d yourdomain.com -d www.yourdomain.com Certbot verifies domain ownership, obtains the certificate, edits your Nginx config to use it, and sets up the HTTP-to-HTTPS redirect. All of it. When prompted about redirecting HTTP traffic, choose redirect. Step 3: Confirm Auto-Renewal sudo certbot renew --dry-run Certificates last 90 days. The installer adds a systemd timer that renews at around 60 days. The dry run confirms it works. If you skip this check and renewal is broken, you find out when the certificate expires. Verify the timer is active: sudo systemctl list-timers | grep certbot That is the whole process for most sites. Everything below is for people using a purchased certificate. Path B: Installing a Purchased Certificate Step 1: Generate a CSR and Private Key On your server: sudo mkdir -p /etc/nginx/ssl cd /etc/nginx/ssl sudo openssl req -new -newkey rsa:2048 -nodes -keyout yourdomain.key -out yourdomain.csr Fill in the prompts. Common Name must be your exact domain. For a wildcard, use *.yourdomain.com . The private key never leaves your server. Any vendor asking you to upload it is doing something wrong. Step 2: Submit the CSR and Collect Your Files Paste the contents of the .csr file into your certificate authority's order form. Complete their validation. You will receive back your domain certificate and one or more intermediate certificates, sometimes called a CA bundle. Step 3: Build the Certificate Chain Nginx needs the domain certificate and the intermediates in a single file, in the correct order. Your certificate first, then the intermediates: sudo cat yourdomain.crt intermediate.crt root.crt > yourdomain-chained.crt Order matters. Reversed, browsers will report an incomplete chain — and desktop Chrome often hides the problem while mobile browsers and API clients fail hard. This is the single most common mistake with manual installs. Step 4: Set Permissions sudo chmod 600 /etc/nginx/ssl/yourdomain.key sudo chown root:root /etc/nginx/ssl/yourdomain.key A world-readable private key means anyone with shell access can impersonate your site. Configuring the Nginx Server Block Open your site config, typically at /etc/nginx/sites-available/yourdomain.com : 1 2 3 4 5 6 7 8 9 10 11 12 13 14 15 16 17 18 19 20 server { listen 443 ssl ; http2 on ; server_name yourdomain . com www . yourdomain . com ; ssl_certificate / etc / nginx / ssl / yourdomain - chained . crt ; ssl_certificate_key / etc / nginx / ssl / yourdomain . key ; ssl_protocols TLSv1 . 2 TLSv1 . 3 ; ssl_prefer_server_ciphers off ; ssl_session_cache shared : SSL : 10m ; ssl_session_timeout 1d ; ssl_session_tickets off ; add_header Strict - Transport - Security "max-age=63072000" always ; root / var / www / yourdomain ; index index . html ; } server { listen 80 ; server_name yourdomain . com www . yourdomain . com ; return 301 https : / / $host$request_uri ; } A few notes on that config. The listen 443 ssl http2 one-liner is deprecated in Nginx 1.25 and later. Use the separate http2 on; directive shown above. Plenty of older tutorials still show the old form and it now produces a warning. TLS 1.0 and 1.1 are omitted deliberately. Both are deprecated and will fail a PCI compliance scan. ssl_prefer_server_ciphers off is correct for modern setups. TLS 1.3 clients pick sensibly on their own. Start HSTS with a short max-age while testing. Once a browser has seen the header, it refuses plain HTTP for that duration and there is no way to undo it from the server side. Only add includeSubDomains and preload once you are certain every subdomain serves HTTPS. Testing and Reloading Always test before reloading: sudo nginx -t If it reports the syntax is ok and the test is successful: sudo systemctl reload nginx Use reload rather than restart. Reload applies the new config without dropping active connections. Verifying the Installation Check the chain from the command line: openssl s_client -connect yourdomain.com:443 -servername yourdomain.com Look for "Verify return code: 0 (ok)" at the end of the output. Anything else means a chain problem. Then run your domain through SSL Labs' server test. Aim for an A. If you score lower, the report tells you which directive is responsible. Check your site in a browser too, on mobile as well as desktop. Mobile browsers are stricter about incomplete chains and will surface problems desktop Chrome quietly tolerates. Common Nginx SSL Errors SSL_ERROR_RX_RECORD_TOO_LONG — you are serving plain HTTP on port 443. The ssl parameter is missing from your listen directive. ERR_CERT_AUTHORITY_INVALID — the intermediate certificates are missing or in the wrong order. Rebuild the chained file. nginx: [emerg] cannot load certificate ... PEM_read_bio_X509 — the file path is wrong, or the file has Windows line endings from being edited on a desktop. Run dos2unix on it. ERR_SSL_KEY_MISMATCH — the certificate does not match the private key. Compare the modulus hashes of both files with openssl x509 -noout -modulus and openssl rsa -noout -modulus . They must match. Certbot fails with "Timeout during connect" — port 80 is blocked. Check both your server firewall and your cloud provider's security group. Padlock shows but some resources are blocked — mixed content. Something on the page is still loading over HTTP. Check the browser console. Keeping It Working Set a calendar reminder before expiry even with auto-renewal enabled. Renewals fail silently when firewall rules change or a config edit breaks the challenge path. Monitor the certificate externally. Uptime tools with certificate expiry checks catch what your server will not tell you. Redirect HTTP to HTTPS at the server level rather than in application code. It is faster and it cannot be bypassed by a routing bug. If you sit behind Cloudflare or a load balancer, know which layer terminates TLS. Origin certificate misconfigurations behind a proxy are a common and confusing failure mode. Where This Fits in a Real Project TLS is one layer. Security headers, rate limiting, and keeping the server patched matter alongside it. Our team configures and maintains production infrastructure for client software, from Nginx and TLS through to CI and observability. You can see the stack we work across on our technologies page and browse shipped work in our projects portfolio . If you are setting up the rest of the environment, the NVM on Windows tutorial covers Node version management, and the S3 backup guide handles data protection on AWS. More walkthroughs are on the tutorials hub , and longer technical writing lives on the blog.
Subscribe for the latest drops and behind-the-scenes builds from the Craxinno team.
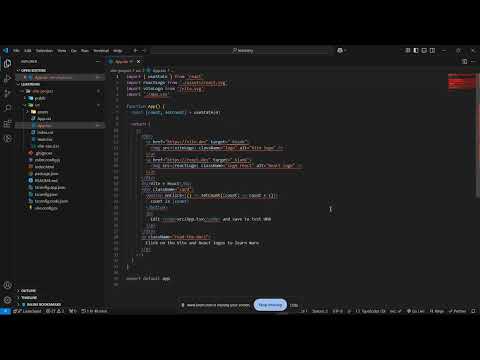
Setting up a React project with TypeScript takes about two minutes with the right tool. The hard part is knowing which tool to use, because the answer changed. Create React App was the default for years. It was deprecated in February 2025 and is no longer recommended for new projects. If a tutorial tells you to run npx create-react-app , it is out of date. This guide uses Vite, which is what the React team now points people toward for single-page apps. What You Need First Node.js version 20 or higher. Check with: node -v If that command is not recognised or the number is below 20, install Node first. On Windows, the NVM tutorial covers installing it in a way that lets you switch versions per project. You also need npm, which ships with Node. Confirm with npm -v . A code editor. VS Code has the strongest TypeScript support out of the box. Why Vite Instead of Create React App Three reasons, briefly. Speed. Vite starts a dev server in under a second because it serves native ES modules rather than bundling everything upfront. CRA's Webpack setup takes tens of seconds on a large project. Maintenance. CRA has not received meaningful updates in years and its dependency tree carries known vulnerabilities that cannot be resolved without ejecting. Direction. The React documentation now recommends either a framework such as Next.js, or Vite for a plain single-page app. If you are building something with routing, data fetching, and SEO requirements, consider Next.js instead. Vite is the right answer for a client-side app, a dashboard behind a login, or anything you are learning on. Step 1: Create the Project Run this in the folder where you keep your projects: npm create vite@latest my-app -- --template react-ts The react-ts template is the important part. It scaffolds React with TypeScript already configured — no separate setup step. If you prefer the interactive prompts, run npm create vite@latest on its own and select React, then TypeScript, when asked. Step 2: Install Dependencies cd my-app npm install This pulls down React, TypeScript, Vite, and the type definitions. It takes a few seconds. Step 3: Run It npm run dev Vite prints a local URL, usually http://localhost:5173 . Open it and you have a working React app with hot module replacement — save a file and the browser updates without a full reload, preserving component state. Note the command. Vite uses npm run dev , not npm start . That difference catches out everyone coming from CRA. Understanding the Project Structure 1 2 3 4 5 6 7 8 9 10 11 my - app / ├── public / ├── src / │ ├── App . tsx │ ├── main . tsx │ ├── index . css │ └── vite - env . d . ts ├── index . html ├── package . json ├── tsconfig . json └── vite . config . ts A few things differ from what you may expect. index.html sits at the project root, not inside public/ . Vite treats it as the entry point and processes it directly. main.tsx is where React mounts to the DOM. App.tsx is your root component. .tsx is the extension for files containing JSX. Plain TypeScript files without JSX use .ts . vite-env.d.ts gives TypeScript the type definitions for Vite's environment variables. Leave it alone. Writing Your First Typed Component Delete the contents of App.tsx and replace with: 1 2 3 4 5 6 7 8 9 10 11 12 13 14 15 type GreetingProps = { name : string ; count ? : number ; } ; function Greeting ( { name , count = 0 } : GreetingProps ) { return ( < div > < h1 > Hello , { name } < / h1 > < p > Clicked { count } times < / p > < / div > ) ; } export default function App ( ) { return < Greeting name = "Nimish" / > ; } Two things worth understanding here. The type block defines the shape of the props. TypeScript now checks every use of Greeting against it. Pass a number where a string is expected and your editor flags it before you run anything. The ? on count marks it optional. Without the ? , TypeScript requires it on every usage. Try removing name="Nimish" and watch the error appear in your editor. That immediate feedback is the entire value proposition of TypeScript. Typing State and Events Two patterns you will use constantly. State usually infers its own type: 1 const [ count , setCount ] = useState ( 0 ) ; TypeScript works out that count is a number from the initial value. You only need an explicit type when the initial value does not tell the full story: 1 const [ user , setUser ] = useState < User | null > ( null ) ; Event handlers need their event typed: 1 2 3 function handleChange ( e : React . ChangeEvent < HTMLInputElement > ) { setName ( e . target . value ) ; } The element type inside the angle brackets matters. HTMLInputElement for inputs, HTMLTextAreaElement for textareas, HTMLSelectElement for selects. Getting it wrong means e.target.value will not be typed correctly. Building for Production npm run build This type-checks the whole project, then compiles and bundles into a dist folder. The build fails on type errors. That is intentional and it is the point — a type error caught at build time is a bug that never reaches a user. Preview the production build locally before deploying: npm run preview The dist folder is what you deploy. It is static output, so it works on Netlify, Vercel, S3, or any static host. The Netlify deployment guide covers that process, though for a Vite app you would normally connect Git rather than dragging the folder. Common Errors and Fixes Cannot find module './App' or its corresponding type declarations — usually a case mismatch in the filename, or a missing .tsx extension on the file itself. JSX element implicitly has type 'any' — the React type definitions are missing. Run npm install -D @types/react @types/react-dom . Property does not exist on type — you are accessing a field that is not in your type definition. Add it to the type rather than reaching for any . Port 5173 already in use — another Vite server is running. Either stop it, or start this one with npm run dev -- --port 3000 . Blank page after building and deploying — the base path is wrong. If you are deploying to a subdirectory, set base: '/subdirectory/' in vite.config.ts . Environment variables are undefined — Vite only exposes variables prefixed with VITE_ . Rename API_URL to VITE_API_URL and access it via import.meta.env.VITE_API_URL , not process.env . Migrating an Existing CRA Project If you have a Create React App project you want to move over, the outline is: Install Vite and the React plugin, remove react-scripts , move index.html from public/ to the root and add a script tag pointing at src/main.tsx , rename any .js files containing JSX to .jsx or .tsx , swap process.env.REACT_APP_* for import.meta.env.VITE_* , and update your package scripts to dev , build , and preview . Budget an afternoon for a mid-sized app. Most of the time goes on environment variables and any Webpack-specific configuration you had customised. Where This Fits in a Real Project A scaffolded project is the starting point. What follows is routing, state management, a testing setup, and a CI pipeline — and those decisions are cheaper to make now than to retrofit later. Our team builds production React and Next.js applications in TypeScript for client software. You can see the stack we work across on our technologies page and browse shipped work in our projects portfolio . If you are still setting up locally, the NVM on Windows tutorial handles Node version management. For deployment, the Netlify guide covers static hosting and the SSL certificate guide covers self-hosted TLS. More walkthroughs are on the tutorials hub, and longer technical writing lives on the blog .
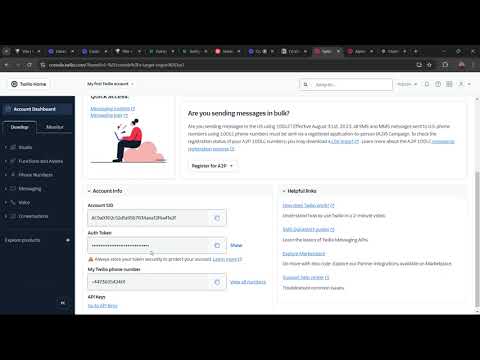
Getting an SMS from "CRAXINNO" instead of a random number looks more legitimate and gets opened more often. Twilio calls this an Alphanumeric Sender ID, and in supported countries it takes about ten minutes to set up. The catch is the phrase "in supported countries." Where you are sending decides almost everything about how this works, and one very large market does not support it at all. Read This First: Where Alphanumeric Sender IDs Do Not Work Alphanumeric Sender IDs are not available for the United States or Canada. Not with an application, not with a business account, not with a workaround. The carriers do not accept them. For US traffic, you register a phone number through A2P 10DLC, or use a toll-free number or short code. Your brand identity comes from carrier-level brand registration rather than from the sender string. This catches out a lot of teams who build the integration first and discover the restriction when messages start failing. If your primary market is North America, stop here and read Twilio's A2P 10DLC documentation instead. Where it does work: most of Europe, the UK, Australia, India, much of Asia, Africa, and the Middle East. Country support and requirements change regularly, so check Twilio's country guidelines for your specific destinations before you build. Three Levels of Country Requirement Supported countries fall into three groups, and knowing which one you are sending to determines your timeline. No registration needed. Set the sender string and send. The UK, Australia, and most of Western Europe work this way. This is what the video demonstrates. Pre-registration required. You submit the sender ID to Twilio, who registers it with local carriers. Approval takes days to weeks. India, Vietnam, the Philippines, Saudi Arabia, the UAE, and Qatar all sit here. Sending an unregistered ID to these countries means silent failure or substitution with a random number. Not supported. The US and Canada, as covered above. India deserves a specific mention because it is the strictest. You need DLT registration with an Indian telecom operator, covering your entity, your sender ID header, and every message template you intend to send. Unregistered templates are blocked. Budget two to three weeks. The Limitation Nobody Mentions Until It Bites Alphanumeric Sender IDs are one-way only. Recipients cannot reply. There is no inbound path. If someone tries, the message goes nowhere and they get no error. This makes them right for one-time passcodes, delivery notifications, appointment reminders, and transactional alerts. It makes them wrong for anything conversational — support threads, two-way confirmations, or any flow where a customer might reasonably respond. If you need replies, use a phone number. Some teams run both: a sender ID for outbound notifications and a number for conversations. Sender ID Format Rules Between 1 and 11 characters. Letters A-Z and a-z, digits 0-9, and spaces. At least one letter is required — an all-numeric string is not valid. No leading or trailing spaces. Two practical notes. Casing is not guaranteed to survive; some carriers normalise everything to uppercase. And avoid characters that look alike across fonts, since a sender ID exists to be recognised at a glance. Pick something short and obviously yours. "CRAXINNO" reads better than "CraxinnoTech" truncated to eleven characters. Step 1: Get Your Credentials Sign in to the Twilio Console. Your Account SID and Auth Token are on the dashboard. The Auth Token is a password. Do not commit it, do not paste it into a client-side file, and do not put it in a support ticket. Store both in environment variables. For anything beyond a test, use an API Key and Secret instead of the Auth Token directly. API keys can be revoked individually without rotating your account credentials, which matters when someone leaves or a laptop goes missing. Step 2: Install the SDK npm install twilio Then create a .env file: 1 2 3 TWILIO_ACCOUNT_SID = your_account_sid TWILIO_AUTH_TOKEN = your_auth_token TWILIO_SENDER_ID = CRAXINNO Add .env to .gitignore before you write anything into it. Step 3: Send the Message 1 2 3 4 5 6 7 8 9 10 11 12 13 14 15 16 17 18 19 20 21 require ( 'dotenv' ) . config ( ) ; const twilio = require ( 'twilio' ) ; const client = twilio ( process . env . TWILIO_ACCOUNT_SID , process . env . TWILIO_AUTH_TOKEN ) ; async function sendSMS ( to , body ) { try { const message = await client . messages . create ( { body , from : process . env . TWILIO_SENDER_ID , to } ) ; console . log ( 'Sent:' , message . sid ) ; return message ; } catch ( error ) { console . error ( 'Failed:' , error . code , error . message ) ; throw error ; } } sendSMS ( '+447700900000' , 'Your verification code is 482913' ) ; The only difference from sending via a phone number is the from value. Instead of a number in E.164 format, you pass your sender string. The to number must be in E.164 format — a plus sign, country code, then the number, with no spaces or dashes. Step 4: Verify Delivery A successful API call means Twilio accepted the message, not that it arrived. Check the actual status: 1 2 const sent = await client . messages ( message . sid ) . fetch ( ) ; console . log ( sent . status , sent . errorCode ) ; Status moves through queued , sent , and ideally delivered . A status of undelivered or failed comes with an error code that tells you why. For anything in production, configure a status callback webhook rather than polling. Twilio posts delivery updates to your endpoint as they happen. Using a Messaging Service Instead For production traffic, create a Messaging Service in the Twilio Console rather than hardcoding the sender. Add both your alphanumeric sender ID and a phone number to the sender pool. Twilio then picks the right sender for each destination automatically — the sender ID where it is supported, the number where it is not. In code you pass messagingServiceSid instead of from . That one change means a message to a US number does not simply fail; it falls back to your registered number. This is the difference between a demo and something you can run a business on. Common Errors 21612 — cannot route to this number. Usually an unsupported destination country for alphanumeric senders. This is what a US number returns. 21606 — the From number is not a valid, SMS-capable inbound number. Your sender string breaks a format rule, or the destination country requires pre-registration you have not completed. Message shows as delivered but the sender is a random number. The carrier substituted it. Common where registration is required and has not been done. 30007 — message filtered. The carrier blocked it, typically for content resembling spam or, in India, an unregistered template. Works in testing, fails in one country. Almost always a country-specific registration requirement. Check Twilio's country guidelines for that destination. 21608 — unverified number on a trial account. Trial accounts can only send to numbers you have verified in the console. Upgrade or verify the recipient. Before You Go Live Test with a real handset in each destination country. Emulators and virtual numbers do not reflect carrier behaviour. Keep a fallback sender configured. A Messaging Service handles this; hardcoded from values do not. Log the message SID for every send. When a customer says they never received a code, the SID is the only way to find out what actually happened. Respect local rules on timing and consent. Several jurisdictions restrict marketing SMS to certain hours and require documented opt-in. The penalties are real. Monitor your delivery rate per country. A drop in one market usually means a carrier policy change rather than a bug in your code. Where This Fits in a Real Project SMS is rarely the whole feature. It sits inside authentication, order flows, or a notification system, alongside retry logic, rate limiting, and a record of what was sent to whom. Our team builds and ships production integrations like this for client software — messaging, payments, and third-party APIs, with the operational layer around them. You can see the stack we work across on our technologies page and browse shipped work in our projects portfolio. If you are setting up the environment around this, the NVM on Windows tutorial covers Node version management, and the SSL certificate guide handles securing the server your webhook endpoint runs on. More walkthroughs are on the tutorials hub, and longer technical writing lives on the blog .

You built something with HTML and CSS. Now you want a link you can send to someone. Netlify's drag-and-drop deploy gets you a live URL in under a minute. No Git, no terminal, no build tools. Drag a folder onto a page and the site is online. This guide covers the upload, plus the three things that go wrong immediately afterward: broken image paths, subpages returning 404, and a custom domain that will not connect. What You Need A folder containing your project files. HTML, CSS, images, whatever else the site uses. A file named index.html at the top level of that folder. Not home.html . Not Index.html . Netlify looks for exactly index.html , lowercase, and serves it as your homepage. Getting this wrong is the most common reason a fresh deploy shows a blank page or a directory listing. A Netlify account. The free tier is generous and no card is required. This works for vanilla CSS, Bootstrap, and Tailwind — as long as Tailwind is loaded via CDN or you have already compiled your CSS to a plain file. If you are running a Tailwind build step, compile first and upload the output. Step 1: Check Your Folder Structure Before uploading, open the folder and confirm the layout looks like this: 1 2 3 4 5 6 7 8 my - project / ├── index . html ├── css / │ └── style . css ├── js / │ └── script . js └── images / └── logo . png The critical detail is that index.html sits at the root of the folder you drag, not inside a subfolder. If your files are nested one level deeper, drag the inner folder instead. Step 2: Deploy Sign in at app.netlify.com. On your team dashboard, find the drag-and-drop area — it usually reads "Drag and drop your site output folder here" or sits under Add new site, then Deploy manually. Drag your project folder onto it. Upload takes a few seconds. Netlify assigns a random subdomain such as spontaneous-halva-4f2a91.netlify.app . Your site is live at that URL. That is the whole deploy. Step 3: Rename the Site The random name is fine for a quick share and terrible for a portfolio. Go to Site configuration, then Site details, then Change site name. Pick something readable — yourname-portfolio.netlify.app . Do this before you share the link anywhere, because the old URL stops working once you change it. Fixing Broken Images and Missing CSS Your site loads but the styling is gone and images are missing. This happens to almost everyone on their first deploy, and there are two causes. Case sensitivity. Windows and macOS treat Logo.png and logo.png as the same file. Netlify's servers do not. If your HTML references images/Logo.png and the actual file is logo.png , it worked locally and it will 404 in production. Fix: make every filename lowercase, and make every reference in your HTML match exactly. Absolute local paths. If your HTML contains something like C:/Users/You/Desktop/project/css/style.css , or a leading slash pointing somewhere that does not exist on the server, the browser cannot find the file. Fix: use relative paths. css/style.css and images/logo.png , referenced from where index.html sits. Open your browser's developer console on the live site. Every failed file shows up there as a 404 with the exact path it tried, which usually tells you the answer immediately. Fixing 404s on Subpages Your homepage works, but yoursite.netlify.app/about returns a 404. For a static HTML site, Netlify serves files by path. /about only works if a file named about.html exists — Netlify will match the clean URL to it. If you have pages/about.html , then the URL is /pages/about . If your site is a single-page app using client-side routing, you need a _redirects file at the root of the folder you upload, containing: 1 /* /index.html 200 That tells Netlify to serve index.html for every path and let your JavaScript handle routing. For a plain HTML and CSS site, you do not need this. Adding a Custom Domain Go to Domain management, then Add a domain, and enter your domain. You have two paths. Netlify DNS. Netlify gives you four nameservers to enter at your domain registrar. This is the simpler option and it handles the SSL certificate automatically. External DNS. Keep your current DNS provider and add records manually. Point the apex domain at Netlify's load balancer IP, and add a CNAME for www pointing to your Netlify subdomain. Netlify shows you the exact values. Either way, DNS propagation takes anywhere from a few minutes to 48 hours. Netlify provisions a free Let's Encrypt certificate automatically once the domain resolves, so leave it a while before assuming something is broken. If HTTPS does not appear after a day, check Domain management for a certificate error. It is nearly always a DNS record that has not propagated or a conflicting record left over from a previous host. Updating a Manually Deployed Site Here is the tradeoff nobody mentions in the drag-and-drop tutorials. Every change means dragging the entire folder again. There is no version history you can meaningfully work with, no rollback to a specific commit, and no record of what changed between deploys. For a one-off share or a class assignment, that is fine. For anything you will update more than a handful of times, connect a Git repository instead. Push to your branch and Netlify rebuilds automatically. You get deploy previews on pull requests, a full history, and one-click rollback to any previous deploy. The manual upload is the right way to start. It is the wrong way to maintain something. When to Move Beyond Manual Deploys Move to a Git-connected deploy when any of these become true. You are updating the site regularly. Dragging a folder gets old fast. You need a build step. Tailwind compilation, Sass, a bundler, any framework — Netlify runs the build for you on a Git deploy. More than one person touches the site. Manual uploads have no merge story at all. You need environment variables or serverless functions. Connecting a repo takes about two minutes: Add new site, then Import an existing project, then authorise GitHub and pick the repository. Netlify's Free Tier Limits Worth knowing before you build something that outgrows it. The free tier covers a substantial amount of bandwidth and build minutes per month, and supports custom domains with free SSL. Concurrent builds are limited to one, and some team features are paid. The specific numbers change. Check Netlify's current pricing page rather than trusting any figure in a tutorial, including this one. Where This Fits in a Real Project Static hosting handles the frontend. The moment you need authentication, a database, payments, or an API, the architecture question changes — and that decision is easier to make early than to retrofit. Our team builds and ships production frontends in React and Next.js, along with the backend infrastructure that supports them. You can see the stack we work across on our technologies page and browse shipped work in our projects portfolio . If you are setting up a local environment, the NVM on Windows tutorial covers Node version management. For self-hosted deployments, the SSL certificate guide handles TLS on Nginx. More walkthroughs are on the tutorials hub, and longer technical writing lives on the blog .

Deploying a React app to Netlify by hand takes two minutes. Run the build, drag the output folder, done. Then you click a link, refresh the page, and get a 404. Your app works locally and breaks in production. That is the React-specific problem with static hosting, and it has a one-line fix. This guide covers the deploy plus the three things that go wrong after it: routing 404s, missing environment variables, and a blank white page. Build First, Then Deploy the Output The most common mistake is dragging the project folder. That uploads your source code — src , node_modules , package.json — and Netlify has no way to run it. You deploy the build output , not the project. Run the build: npm run build Vite produces a folder named dist . Create React App produces one named build . Check which you have before you go looking for the wrong folder. Inside it you will find index.html , an assets folder with hashed filenames, and any static files you had in public . That folder is what you drag. Preview It Locally Before Deploying Worth thirty seconds. The production build behaves differently from the dev server. For Vite: npm run preview For CRA: npx serve -s build If it breaks here, it will break on Netlify — and debugging locally is far easier than debugging a deployed site. Deploying Sign in at app.netlify.com. Find the drag-and-drop area on your team dashboard, or go to Add new site, then Deploy manually. Drag dist (or build ) onto it. Not the parent folder. The build output folder itself. Netlify assigns a random subdomain and your site is live. Rename it under Site configuration, then Site details, then Change site name — do that before sharing the link, because the old URL stops resolving once you change it. Fixing the 404 on Page Refresh This is the one that brings people here. Your app loads at the root. You navigate to /dashboard and it works, because React Router handled that in the browser. Then you refresh, and Netlify returns a 404. Here is why. When you refresh, the browser asks Netlify for /dashboard . Netlify looks for a file at that path. There is no such file — your app is a single index.html and the routing happens in JavaScript after it loads. So Netlify correctly returns a 404. The fix is to tell Netlify to serve index.html for every path and let React Router take over. Create a file named _redirects , with no extension, in your public folder: 1 /* /index.html 200 The 200 matters. A 301 or 302 would redirect the browser and change the URL. 200 serves index.html while keeping the requested path intact, which is what React Router needs to read. Because the file sits in public , your build copies it into the output folder automatically. Rebuild and redeploy. Confirm it worked by checking that _redirects actually exists inside dist or build . If it does not, the file is in the wrong place. If you are using hash-based routing with URLs like /#/dashboard , you do not need this. Everything after the # never reaches the server. The Environment Variable Trap This one is specific to manual deploys and catches almost everyone. Environment variables in a React app are baked in at build time. They are not read at runtime. Whatever was in your .env when you ran npm run build is compiled into the bundle. With a Git-connected deploy, you set variables in the Netlify dashboard and they are injected during Netlify's build. With a manual deploy, Netlify never runs a build — so dashboard variables do nothing at all. Your .env file at build time is the only thing that matters. Two rules follow from that. Set your production values locally before running npm run build , or you will ship your development API URL. And never put a secret in a frontend environment variable. Anything compiled into the bundle is readable in the browser by anyone who opens devtools. API keys, database credentials, and tokens belong on a server. This is true regardless of how you deploy. Note the prefixes: Vite exposes only variables starting with VITE_ , accessed via import.meta.env . CRA uses REACT_APP_ via process.env . Fixing a Blank White Page The deploy succeeds, the URL loads, and you get nothing. Open devtools and check the console. 404s on the JS and CSS files. The base path is wrong. If you are deploying to the site root, base should be / in vite.config.ts , or homepage should be absent from package.json in CRA. A homepage field left over from a GitHub Pages deploy is a common culprit. A JavaScript error in the console. The app crashed on mount. Something that worked in development is failing in the production build — often an undefined environment variable, or code that assumed a dev-only condition. Nothing in the console at all. You probably dragged the wrong folder and Netlify is serving an empty directory. Check that index.html is at the top level of what you uploaded. When to Stop Deploying Manually Manual deploys are fine for a demo, a portfolio piece, or showing a client something on a Friday afternoon. They stop being fine quickly, and for a React app the reasons are sharper than for a static site. Every update means rebuilding locally and dragging again. Whoever deploys has to have the right .env on their machine, which means environment configuration lives on individual laptops instead of in the platform. There is no deploy history worth using. When a build breaks production, you cannot roll back to a known-good commit — you can only rebuild from whatever your local code happens to be. And there is no way for two people to deploy safely. Whoever ran npm run build most recently defines what is live. Connecting a Git repository takes about two minutes and removes all of it. Add new site, Import an existing project, authorise GitHub, pick the repo. Set the build command to npm run build and the publish directory to dist or build . Netlify rebuilds on every push, gives you deploy previews on pull requests, and lets you roll back to any previous deploy in one click. Do the manual deploy to understand what is happening. Then connect the repo. Committing the Config Instead Once you are on Git deploys, move your redirect rule into a netlify.toml at the project root: 1 2 3 4 5 6 7 [ build ] command = "npm run build" publish = "dist" [ [ redirects ] ] from = "/*" to = "/index.html" status = 200 This keeps deployment configuration in version control alongside the code, which means a new team member gets it automatically rather than discovering it after their first broken deploy. Where This Fits in a Real Project Static hosting handles a client-rendered React app well. The calculation changes once you need SEO on public pages, server-side rendering, or an API layer — at which point Next.js on a platform that runs server code is usually the better shape. Our team builds and ships production React and Next.js applications for client software, including the deployment and observability around them. You can see the stack we work across on our technologies page and browse shipped work in our projects portfolio. If you are earlier in the process, the React with TypeScript tutorial covers project setup, and the NVM on Windows tutorial handles Node version management. For plain static sites, the HTML and CSS Netlify guide covers the simpler case. More walkthroughs are on the tutorials hub , and longer technical writing lives on the blog .
You can build a working Node.js server with zero dependencies. Node ships with an HTTP module and about six lines gets you a running server. So why does almost every real project use Express? The honest answer is not "Express is better." It is that the built-in module leaves you to write routing, body parsing, and error handling yourself, and that code is tedious to get right. This guide builds the same server both ways so you can see exactly what Express is doing for you. The Server with No Dependencies Create server.js : 1 2 3 4 5 6 7 8 const http = require ( 'http' ) ; const server = http . createServer ( ( req , res ) => { res . writeHead ( 200 , { 'Content-Type' : 'text/plain' } ) ; res . end ( 'Hello from Node' ) ; } ) ; server . listen ( 3000 , ( ) => { console . log ( 'Running on http://localhost:3000' ) ; } ) ; Run it: node server.js Open http://localhost:3000 and you have a working server. No npm install, no packages, nothing downloaded. createServer takes a callback that fires on every request. req holds the incoming request, res is what you write back. res.end() sends the response and closes the connection — forget it and the browser hangs waiting. Where the Built-In Module Starts Hurting Add a second route and the problem appears: 1 2 3 4 5 6 7 8 9 10 11 12 const server = http . createServer ( ( req , res ) => { if ( req . url === '/' && req . method === 'GET' ) { res . writeHead ( 200 , { 'Content-Type' : 'text/plain' } ) ; res . end ( 'Home' ) ; } else if ( req . url === '/about' && req . method === 'GET' ) { res . writeHead ( 200 , { 'Content-Type' : 'text/plain' } ) ; res . end ( 'About' ) ; } else { res . writeHead ( 404 , { 'Content-Type' : 'text/plain' } ) ; res . end ( 'Not found' ) ; } } ) ; Two routes, and it is already an if-else chain. Ten routes is unreadable. It gets worse with URL parameters. There is no built-in way to match /users/42 and extract the 42 — you write string parsing or a regex yourself, for every route. Reading a POST body is worse still. req is a stream, so you collect it manually: 1 2 3 4 5 6 let body = '' ; req . on ( 'data' , chunk => { body += chunk ; } ) ; req . on ( 'end' , ( ) => { const data = JSON . parse ( body ) ; // handle it } ) ; That is the code you write for every single route that accepts data. And it has no size limit, so a large enough request will exhaust your memory. None of this is difficult. It is just repetitive, easy to get subtly wrong, and entirely solved already. The Same Server in Express npm init -y npm install express Then: 1 2 3 4 5 6 7 8 9 10 11 12 13 14 15 16 17 18 const express = require ( 'express' ) ; const app = express ( ) ; app . use ( express . json ( ) ) ; app . get ( '/' , ( req , res ) => { res . send ( 'Home' ) ; } ) ; app . get ( '/about' , ( req , res ) => { res . send ( 'About' ) ; } ) ; app . get ( '/users/:id' , ( req , res ) => { res . json ( { id : req . params . id } ) ; } ) ; app . post ( '/users' , ( req , res ) => { res . status ( 201 ) . json ( { received : req . body } ) ; } ) ; app . listen ( 3000 , ( ) => { console . log ( 'Running on http://localhost:3000' ) ; } ) ; Compare that to the version above. Routing is declarative. :id gives you req.params.id with no parsing. express.json() handles body parsing for every route at once, with a size limit by default. res.json() sets the content type for you. Express is not doing anything magic. It is a layer over the same http module — you could write all of this yourself. It is that you would be writing it again on every project. Auto-Reload Without nodemon Most tutorials tell you to install nodemon. You do not need it any more. Node has a built-in watch flag: node --watch server.js Save a file and the server restarts. No dependency, no config. nodemon still has its uses for more complex watch setups, but for a basic server the built-in flag covers it. Add it to package.json : 1 2 3 4 "scripts" : { "dev" : "node --watch server.js" , "start" : "node server.js" } Then npm run dev in development, npm start in production. Never run --watch in production. Express 5 vs Express 4 Worth knowing, because it explains why tutorial code sometimes fails. npm install express now gives you Express 5. Most Express 4 code works unchanged, but a few things differ. Async errors are handled automatically. In Express 4, a rejected promise inside a route handler would hang the request unless you wrapped it in a try/catch or a helper. Express 5 forwards it to your error handler. This is the biggest practical improvement. Some methods were removed — res.send(status) and app.del() among them. Use res.sendStatus() and app.delete() . Wildcard route patterns changed. Bare * is no longer valid; named wildcards like /*splat are required. If you are following an older tutorial and hitting unexpected errors, check which major version you are on with npm list express . Error Handling Express error middleware takes four arguments. The fourth is what identifies it as an error handler, so it must be there even if unused: 1 2 3 4 app . use ( ( err , req , res , next ) => { console . error ( err . stack ) ; res . status ( 500 ) . json ( { error : 'Something went wrong' } ) ; } ) ; Register this after all your routes. Order matters in Express — middleware runs in the order you declare it. Add a 404 handler just before it, since a request that matches no route falls through: 1 2 3 app . use ( ( req , res ) => { res . status ( 404 ) . json ( { error : 'Not found' } ) ; } ) ; When to Skip Express Express is the default for good reason, but it is not the only answer. Use the built-in http module when you are writing a health check endpoint, a tiny webhook receiver, or anything where a dependency-free binary matters. Also use it when you are learning — understanding what Express abstracts makes you better at using it. Consider Fastify when throughput is the constraint. It is meaningfully faster on JSON-heavy workloads and has schema validation built in. Consider Hono if you are targeting edge runtimes such as Cloudflare Workers, where Express does not run. And if you are building a full application with a frontend, a framework like Next.js may replace the need for a separate server entirely. For a standard REST API on a normal Node deployment, Express remains the sensible default. The ecosystem is enormous and every problem you hit has been solved publicly. Before You Call It Production-Ready A basic server is not a deployable one. The gap includes, at minimum: Environment-based configuration, so the port and any URLs come from environment variables rather than being hardcoded. Graceful shutdown, so in-flight requests finish when the process receives a termination signal instead of being cut off. Security headers and rate limiting, usually via helmet and express-rate-limit . Structured logging that produces machine-readable output rather than console.log . A process manager or container runtime that restarts the server when it crashes. Each of those is small on its own. Skipping all of them is how a working prototype becomes a 3am incident. Where This Fits in a Real Project The server is the easy part. What takes the time is everything around it — database connections and pooling, authentication, request validation, observability, and a deployment story that lets you ship without holding your breath. Our team builds and ships production Node.js and TypeScript backends for client software, along with the infrastructure they run on. You can see the stack we work across on our technologies page and browse shipped work in our projects portfolio . If you are setting up your environment, the NVM on Windows tutorial covers Node version management. Once you have something to deploy, the SSL certificate guide handles TLS on Nginx in front of it. More walkthroughs are on the tutorials hub , and longer technical writing lives on the blog .
Every tutorial here lives on our channel too. Subscribe for the latest drops and behind-the-scenes builds.